


Supplies Required
Make sure you have the necessary supplies available before we start:
Pick a high-quality drawing paper that can withstand a variety of drawing techniques.
Choose a variety of pencils, ranging from (hard) to 6B (soft), to achieve various tones.
Eraser: A standard eraser works well for corrections, while a kneaded eraser is wonderful for subtle highlights.
Sharpener: Maintain pencil sharpness for clean lines.
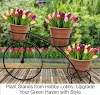
Creating a Flower Pot Drawing
Determine where your flower container and other pieces will go in the composition (H3). Consider focal points and balance.
Simple Shapes: Begin with basic flower and container shapes. Use rectangles for the pot and ovals for the flowers.
Filling up the Flower Pot with Details
Texture and Patterns: Use thin, brief lines to give the pot some texture. Try out different designs to make it stand out.
Draw tiny cracks and chips along the pot's surface to give it a more realistic appearance.
Giving Life to Flowers
Draw individual petals using curved lines in the Petals and Leaves category. Use straightforward shapes like ovals and triangles to add leaves.
Use darker hues on the interior of petals and lighter ones on their margins to add depth. The result is a 3D effect.
Adding Shading to Improve
Decide where the light is originating from by understanding the light source. To add realistic shading, do so.
Use hatching, cross-hatching, and blending techniques to experiment with varied textures and shadows while using shading techniques.
Giving Life to the Background
Draw a rough outline of the sky and the horizon if your scenario has a background.
Add trees, grass, or other scenery to the picture to make it more lush and natural.
Complete the drawing.
Detail Refinement: Give careful consideration to minute details and make any necessary modifications.
Enhance contrast and add highlights to make your drawing stand out with contrast and highlights.
Including Personal Elements
Including Colours: If you'd like, use watercolours or coloured pencils to add a dash of colour.
Signature: Add your proud signature to make your work stand out.
Final Verdict
There's more to drawing a flower pot scene than just drawing lines on paper. It's about using your imagination to create something, experimenting with different mediums, and realising your artistic vision. Keep in mind that every artist's path is distinct, so accept the flaws and delight in the creative process as you bring your work to life.
FAQs
- I'm a newbie, so. Does this tutorial apply to me?
- Can I create this drawing on a digital platform?
- How can I select the ideal colour scheme?
- What if I make a mistake and am unable to correct it?
- Where online can I display my completed drawing?


0 Comments